
2) Constructing the patterns
With the board that we'll copy in our hands, it would be better to make three separate "patterns". I use quotation marks because I consider it practically impossible to copy with absolute accuracy such a complicated shape with amateur tools, no matter how good an "eye" or "hand" you have. If anyone owns a 3D scanner and cnc of corresponding size, please contact me…!
The patterns are needed as a guideline, in order to create a consrtuction that planes, turns and is approximate in dimesions and feeling with the original board. If we want to combine elements of more than one boards, it is preferable to make paper patterns for all, compare them and combine them (with god's help) during the creation of the final wooden patterns.
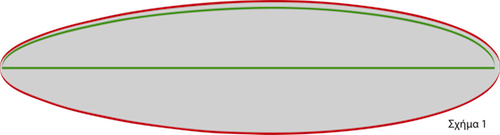
The first pattern concerns the outline of the board, as defined by the edge in the hull's perimeter (picture 1).
The second concerns the outline of the board, as defined by the outer point of the rail (picture 2), or if you prefer the projection of the board's hull. The difference of the two outlines, although only a few millimetres is significant, as it determines -to a degree- the shape of the rail.
The third pattern is in essence the "negative" or complementary of the rockerline (picture 3).
Using the third as a guideline, we make the fourth (picture 4), which illustrates the board's incision in relation to the centre line.
 |
|||
σχήμα 1 |
σχήμα 2 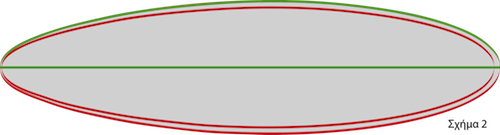 |
σχήμα 3 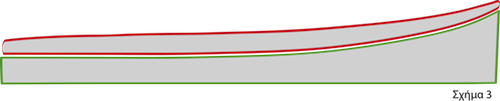 |
σχήμα 4 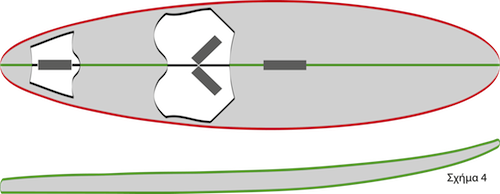 |
κλικ στις μικρές εικόνες για να εμφανιστούν μεγάλες επάνω |
|||
In all of the shapes, the green line designates the pattern we are talking about. The red line is the board.
We construct only one copy for each of the first two patterns, so as to avoid assymetries between the right and the left side of the board.
Patterns number 2 and 4 have to be constructed in duplicate.
Page:
Previous > 0 > 1 > 2 > 3 > 4 > 5 > 6 > 7 > 8 > Next
www.boardsNwheels.gr > English version > How to > Buillding a custom windsurf board
Home - Site map - Sign Up - Contact
Website and workshop for the repair and construction of windsurf, surf, SUP, snowboard and bicycles.
Greek ![]() Version
Version
© 2014 - 2016 Kostas Stamatakos